
How to Use a Floor Burnisher
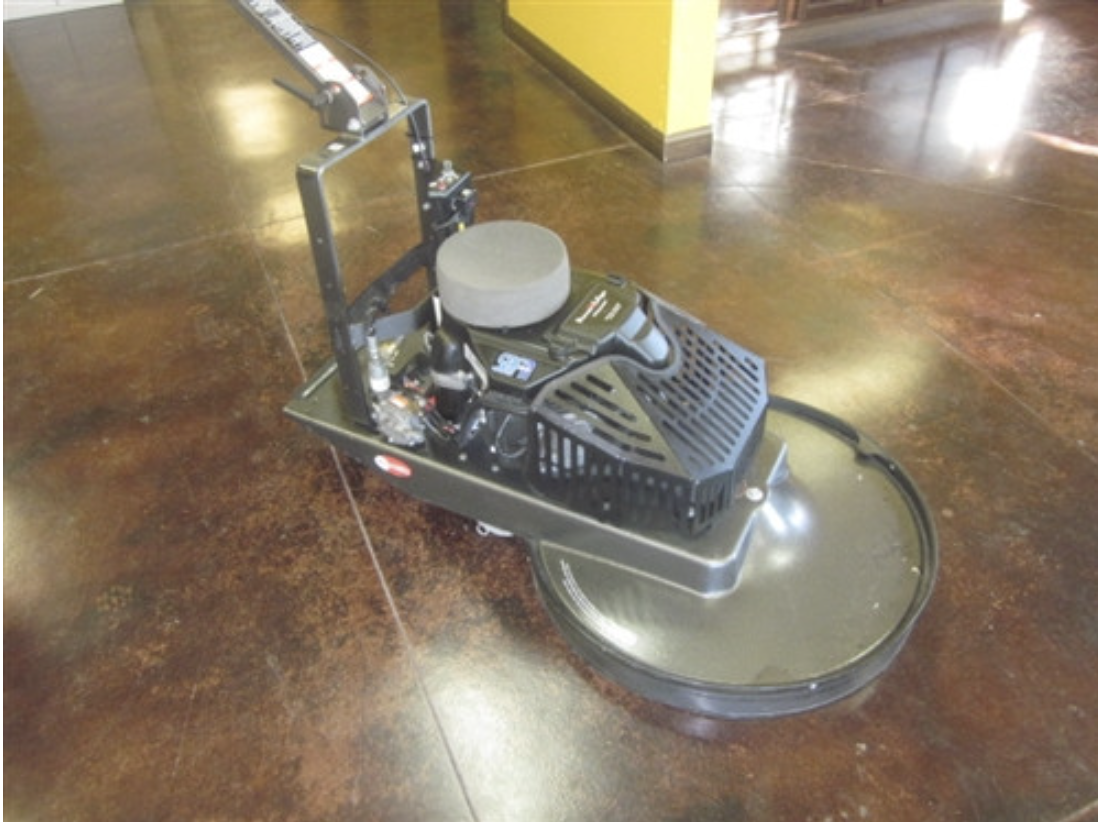
In the world of floor maintenance, achieving a high-gloss finish that not only impresses but lasts is often the hallmark of excellence. This is where floor burnishing steps into the spotlight, transforming dull, lifeless floors into brilliant, reflective surfaces that can mirror the overhead lights with ease. Beyond the immediate aesthetic appeal, burnishing floors offers significant maintenance benefits, extending the life of the floor finish and reducing the need for frequent deep cleans.
Whether you’re managing a commercial space, an industrial facility, or just aiming for the highest standard in residential floor care, understanding and implementing proper burnishing techniques can elevate the cleanliness and appearance of your floors to new heights.
What is Floor Burnishing?

At its core, floor burnishing is a high-speed floor finishing technique that uses a burnisher—a machine that can spin at speeds ranging from 1,500 to 2,500 revolutions per minute—to polish the floor surface. Unlike buffing, which typically employs a slower speed to create a smooth, but not necessarily shiny, finish, burnishing uses speed and friction to heat and smooth the floor finish.
This process not only removes scuffs and marks but also leaves behind a glossy shine that significantly enhances the floor’s appearance.
The Benefits of Burnishing Floors
Burnishing your floors offers a multitude of benefits that go beyond just a visually appealing shine. Firstly, it significantly enhances the aesthetic appeal of your space, making it look well-maintained and professional. This is particularly important in commercial settings where first impressions can influence customer perception and experience.
Moreover, the process of burnishing creates a harder, more durable finish. This durability translates to floors that are more resistant to scratches, scuffs, and marks, thereby reducing the need for frequent repairs or refinishing. Additionally, a well-burnished floor is easier to clean, as the smooth surface allows for easier removal of dirt and debris. This not only saves time and effort in daily maintenance but also contributes to the overall longevity of your flooring.
Preparing to Burnish Floors
Selecting the Right Equipment
Before you begin the process, it’s crucial to have the right equipment on hand. The cornerstone of effective floor burnishing is a high-speed burnisher. These machines can operate at speeds ranging from 1500 to 3000 RPM, generating the necessary heat and friction to produce a high-gloss finish. Alongside the burnisher, you’ll need the correct burnishing pad. These pads come in various grades, from soft to aggressive, and the choice depends on your floor’s finish and the level of shine you’re aiming for.
Additionally, a quality dust mop is essential for removing loose dirt and debris from your floors before burnishing. This step is critical to avoid grinding dirt into the floor finish, which can cause damage and reduce shine.
Prepping the Area
Proper preparation is key to achieving the best burnishing results and ensuring the process is as efficient as possible. Thoroughly dust mop the area to remove any loose dirt, dust, or debris. This step ensures that the burnishing pad can work directly on the floor finish without pushing around particles that could scratch or damage the floor.
Next, inspect the area for any sticky or stubborn residues that a dust mop can’t remove. In such cases, a damp mop with a mild cleaning solution can be used to clean the area before burnishing. Once the floor is clean and dry, place wet floor signs around the perimeter of the area you’ll be working in. This not only helps to prevent accidents but also signals to others to keep the area clear of foot traffic and obstructions.
Finally, remove any furniture, rugs, or other items from the area to ensure a smooth and uninterrupted burnishing process. This preparation stage is crucial for a successful burnish, setting the stage for a floor that shines like never before.
With the right equipment selected and the area fully prepped, you’re now ready to begin the actual process of burnishing your floors. This preparation ensures that the burnishing will be as effective as possible, resulting in a floor that not only shines but also maintains its luster for longer periods.
The Burnishing Process
Step-by-Step Guide to Burnishing
Once your area is prepped and your equipment is ready, follow these steps to effectively burnish your floors:
1. Install the Burnishing Pad: Attach the selected burnishing pad to your high-speed burnisher. Ensure it is centered to avoid uneven wear and potential damage to the floor.
2. Begin in a Corner: Start in a corner of the room with your burnisher and work your way out. This strategy helps ensure that no area is missed and that you maintain a systematic approach to covering the entire floor.
3. Move Consistently: Move the burnisher in a straight line on the floor at a consistent pace. Overlap each pass by a few inches to ensure full coverage without leaving any lines or unburnished spots.
4. Monitor Heat and Friction: Pay attention to the heat being generated. If a particular area starts to feel too hot, it may indicate that you’re moving too slowly or that the pad needs to be changed.
5. Inspect as You Go: Regularly stop and inspect the floor for an even, glossy finish. If certain areas appear dull or uneven, they may require another pass.
6. Edge Work: Don’t forget the edges and corners. These areas might need special attention with a smaller machine or hand pad to ensure a uniform shine throughout the room.
Choosing the Right Burnishing Pad
Burnishing pads are available in various materials and abrasiveness levels, each suited to different types of floor finishes and conditions. For a standard finish, a soft to medium pad is usually sufficient. For harder finishes or floors that require more aggressive burnishing, a more abrasive pad may be necessary. Always refer to the manufacturer’s recommendations when selecting a pad to ensure compatibility with your floor finish.
Applying Floor Finish and Solutions
For an enhanced shine, consider applying a floor finish or restorer before burnishing. These products can fill in microscopic scratches and provide a smoother surface for the burnisher to work on, resulting in a higher gloss. Apply the finish according to the manufacturer’s instructions, allowing it to dry thoroughly before burnishing. In some cases, a spray buff solution can be used during burnishing to lubricate the pad and increase the shine.
By following these steps and choosing the right equipment and products, you can achieve a deep, reflective shine on your floors that not only looks professional but also extends the life of your floor finish. Burnishing is a key component of a comprehensive floor care program, contributing to the beauty and longevity of your flooring.
Can all types of floors be burnished?
Not all floor types are suitable for burnishing. Typically, burnishing is best suited for vinyl composite tile (VCT), certain types of terrazzo, and finished concrete floors that have been sealed with a high-speed floor finish. Floors such as natural wood, laminate, or unsealed concrete are not ideal candidates for burnishing due to their material properties and finish requirements. Always consult with a flooring professional or the floor’s manufacturer to determine if burnishing is appropriate for your specific floor type.
How often should floors be burnished?
The frequency of burnishing depends on several factors, including the amount of foot traffic, the type of facility, and the desired level of shine. High-traffic areas like retail stores, schools, and hospitals may require burnishing as often as once a week to maintain a high gloss. In contrast, lower-traffic areas might only need burnishing monthly or even less frequently. Regularly assess the condition of your floors and adjust your burnishing schedule accordingly to maintain optimal appearance and protection.
What are the signs that a floor needs to be re-burnished?
Several indicators suggest it might be time to re-burnish your floors:
- Reduced Shine: The most obvious sign is a noticeable reduction in gloss or shine, indicating that the floor’s finish has begun to dull.
- Scuff Marks and Scratches: An increase in visible scuffs, scratches, or marks that are not removed through regular cleaning may also indicate the need for burnishing.
- Uneven Finish: Areas of the floor that appear uneven or patchy in terms of gloss level can benefit from burnishing to restore a uniform finish.
- After Refinishing: Following the application of a new floor finish, burnishing helps to seal and protect the finish, enhancing its shine and durability.
By staying attentive to these signs and maintaining a regular burnishing schedule, you can ensure your floors remain in pristine condition, showcasing their beauty and resilience against daily wear and tear.
At PS Janitorial, our dedication lies in maintaining immaculate floors across professional environments. We are delighted to offer a comprehensive range of superior floor burnishers, designed specifically for commercial and industrial areas. Explore our assortment now and learn how our products can transform the cleanliness, safety, and attractiveness of your workspace. Experience the PS Janitorial difference and take your floor maintenance to the next level!