
Is Your Floor Scrubber Leaving Streaks? A 5-Step Troubleshooting Checklist
Let’s be real—there’s nothing quite as irritating as running your trusty floor scrubber over a seemingly filthy floor… only to catch those stubborn streaks in the light. You put in the effort, yet your floors whisper, “Try again.” If you ask us, streaks aren’t simply eyesores; they’re warning signs that something beneath the surface isn’t quite right. They hint at deeper issues impacting the cleanliness, safety, and (let’s be honest) the lifespan of your facility’s flooring. We’ve seen it all with our clients—left unchecked, those streaks become slip hazards, create interruptions in workflow, and, of course, prompt the finance team to cringe at rising cleaning costs. Needless to say: proactive maintenance of your industrial floor scrubber is critical. If your scrubber is leaving streaks, don’t sweat—it happens, and we’re here for you. This straightforward, practical guide will walk you through the five key steps to get your floors spotless again.
Step 1: Check Your Squeegee Blades
Look for Wear and Damage
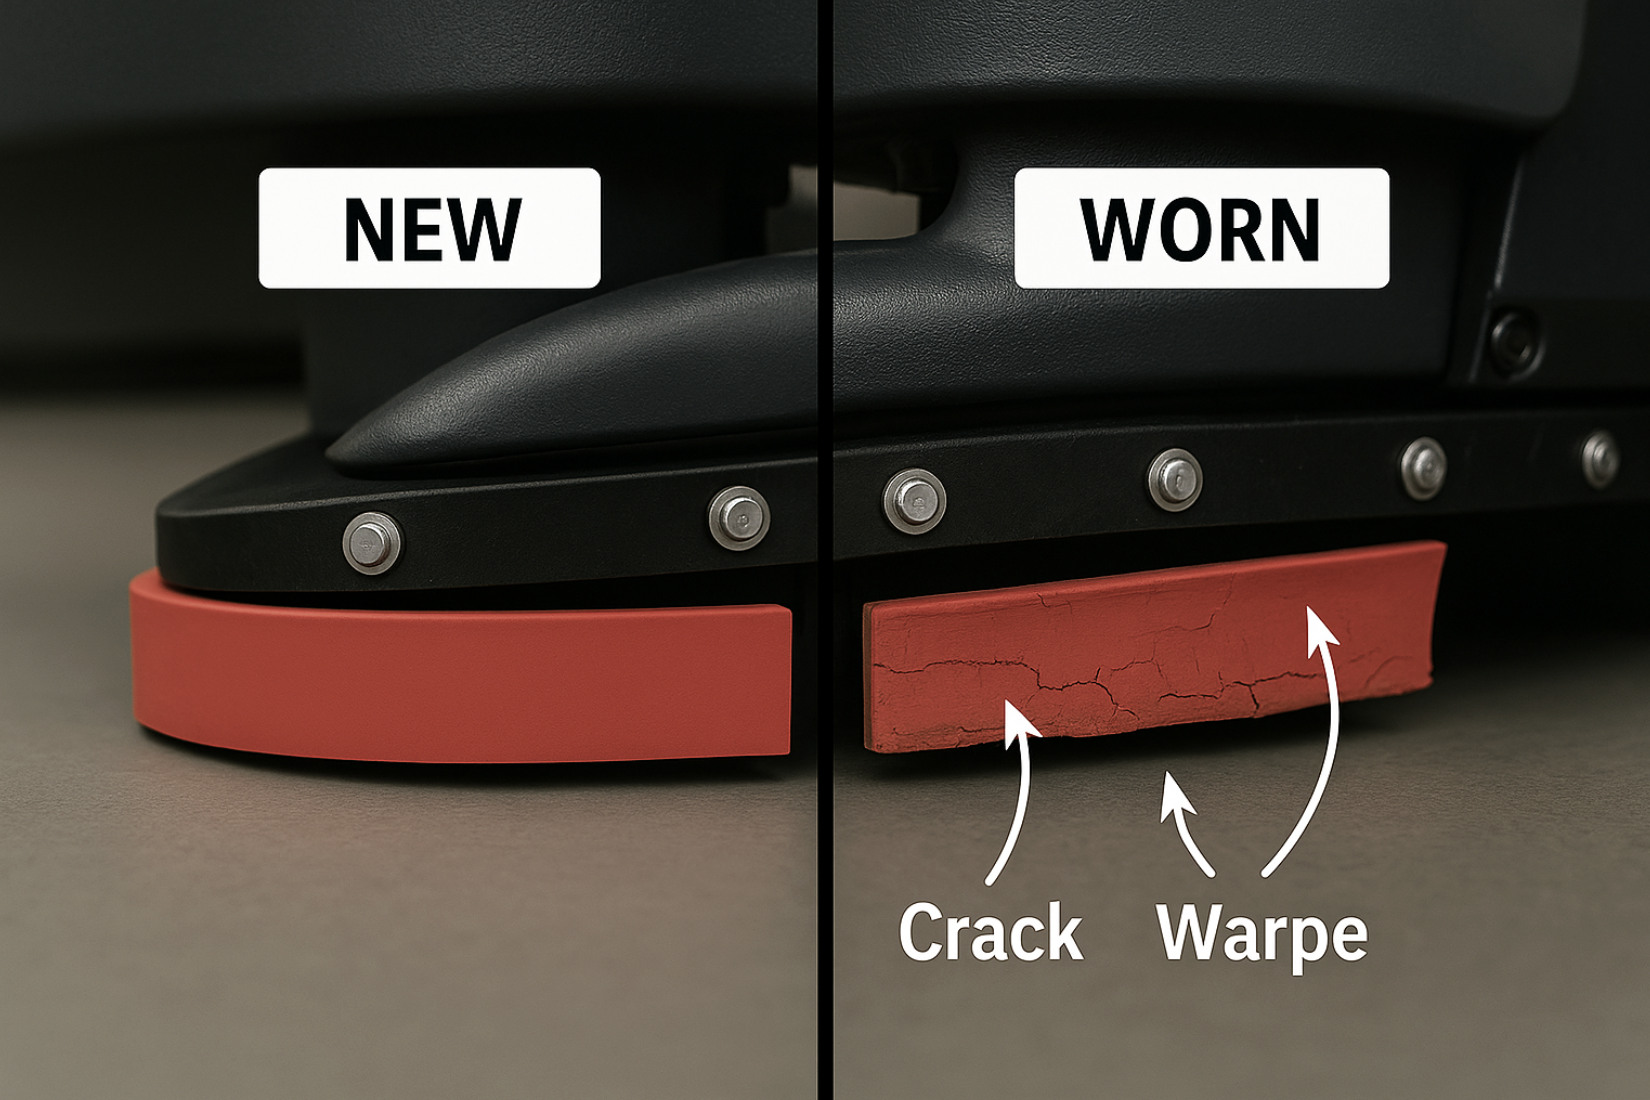
Let’s start at the back: your squeegee blade is much more than a finishing touch for your floor scrubber’s cleaning system—it’s the real MVP making sure dirty water actually gets picked up, leaving nothing but shine (not streaks) behind. Take a good, hard look at that blade every now and again; see any cuts, cracks, or a weird warping at the edges? You’re not imagining things—exposure to harsh cleaning chemicals can do this over time. Little flaws add up, often turning what should be a crisp finish into a watery mess.
Rotate or Replace as Needed
Fun fact: some squeegee blades are like double agents—you can flip them to extend their life. But be smart about it; every 100–200 hours of operation, give the blade the boot and swap a new one in. If, even after flipping, you’re still getting a scrubber leaving streaks or watery trails, the rubber has thrown in the towel. Time for a fresh start.
Ensure Proper Alignment
Here’s a classic pitfall: misalignment. If you notice streaks despite doing everything else “right,” check that blade. It should rest snug and even across the surface, with consistent pad pressure from one side to the other. A lopsided blade can’t pick up water evenly—that’s a recipe for headache. So, grab your manual, dial in that alignment, and let the squeegee do its job.
Step 2: Inspect the Vacuum Hose and Filter
Clear Debris and Clogs
Ask any operator—we’ve all blamed the vacuum system at least once. Seriously though, a blocked vacuum hose can knock your industrial floor scrubber out faster than you think. Streaks and standing puddles are usually the first red flag. To stay a step ahead, disconnect the hose and visually check for obstructions like dust bunnies, stray bits of packaging tape, or remnants of last week’s “floor fix” project.
Maintain Regular Cleaning
Don’t let the recovery tank become a science experiment. We get it, there’s never enough time in the day, but a recovery tank full of dirty water and gunked-up filters is just asking for trouble. Make it a habit—empty after every use, flush the hoses with clean water, and rinse the filter at least once a week. Miss this, and you risk choking your vacuum system until the only thing left performing is your frustration.
Step 3: Examine Pads and Brushes
Check for Worn Pads
No pad lasts forever. We’ve seen pads so worn out, we had to laugh (and then sigh). If the pad on your floor scrubber looks thin, frayed, or patchy, it won’t give you the pressure or coverage you need. That’s when the streaks strike. Replace them at the first sign of real wear—it’s a quick win for streak-free results.
Adjust Pad Pressure
It’s all about balance (isn’t it always?). Too much pad pressure, and you’re grinding down both the pad and your patience; too little, and you’re just pushing around the cleaning solution. Industry advice? Check the recommended settings for your specific machine and flooring type. Adjust as needed and—especially if you handle multiple surfaces—double-check each time for best results.
Use the Right Pad or Brush
Listen, not all floors are created equal, and neither are pads. Choosing the appropriate floor cleaning supplies is make-or-break. Concrete? Go tougher. Hardwood or delicate tile? Reach for something gentler. Honestly, when in doubt, the safest bet is to consult your automatic floor scrubber’s manual or, better yet, ask a supplier who lives and breathes this stuff.
Step 4: Review Water and Solution Flow
Check Spray Jets and Valves
Ever walked behind your scrubber and spotted irregular marks—maybe a dry line here, an oversaturated patch there? Nine times out of ten, it’s from a clogged or misaligned spray jet. Little things like mineral buildup, leftover cleaning chemicals, or dirt can block even the best systems. Inspect your jets, clean them gently (don’t go poking around with sharp objects), and adjust the spray as per your manual to keep things consistent.
Use Correct Chemical Mix
Let’s be honest, we’ve all been tempted to add “a little extra soap.” But more isn’t always better. Over-concentrated cleaning solution leaves residue and, paradoxically, helps streaks stick around for the long haul. To nail it, follow the dilution ratios recommended by both your machine and cleaning chemicals’ creators. Using truly appropriate floor cleaning supplies is one of those rare times where “just enough” really is best.
Step 5: Perform a Quick Test Cycle
Run a Trial Before Each Shift
Hot tip: don’t wait for your whole facility to become a test canvas. Start each shift with a small trial—solution tank full, recovery tank empty. Fire up your automatic floor scrubber in a hidden spot. Watch that water flow. Is the vacuum hose sucking like it should? Is the floor dry, or is dirty water being left behind? You’ll spot problems fast—sometimes before they spiral.
Address Small Issues Immediately
Got a weird sound? Streaks where there shouldn’t be? Instead of crossing your fingers and hoping for the best, hit pause and tackle it right away. Trust us, nipping minor headaches in the bud saves you a major repair bill down the road (your budget will thank you).
Final Thoughts
The secret sauce to gleaming, streak-free floors? Frequent, low-drama maintenance. Check those squeegee blades, vacuum hoses, pads, brushes—and don’t forget your cleaning solution recipe. Making these five steps a habit allows you to troubleshoot and solve most streaking headaches in-house. That means a cleaner, safer, more professional space for you and everyone who steps through your doors.
And if you ever need floor scrubbers, PS Janitorial is here to help keep your floor scrubber (and your sanity) intact. Don’t let streaks take the shine off your hard work—we’ve got your back, every step (and scrub) of the way.