
How to Fix Floor Scrubber Brush: A Step-by-Step Troubleshooting Guide
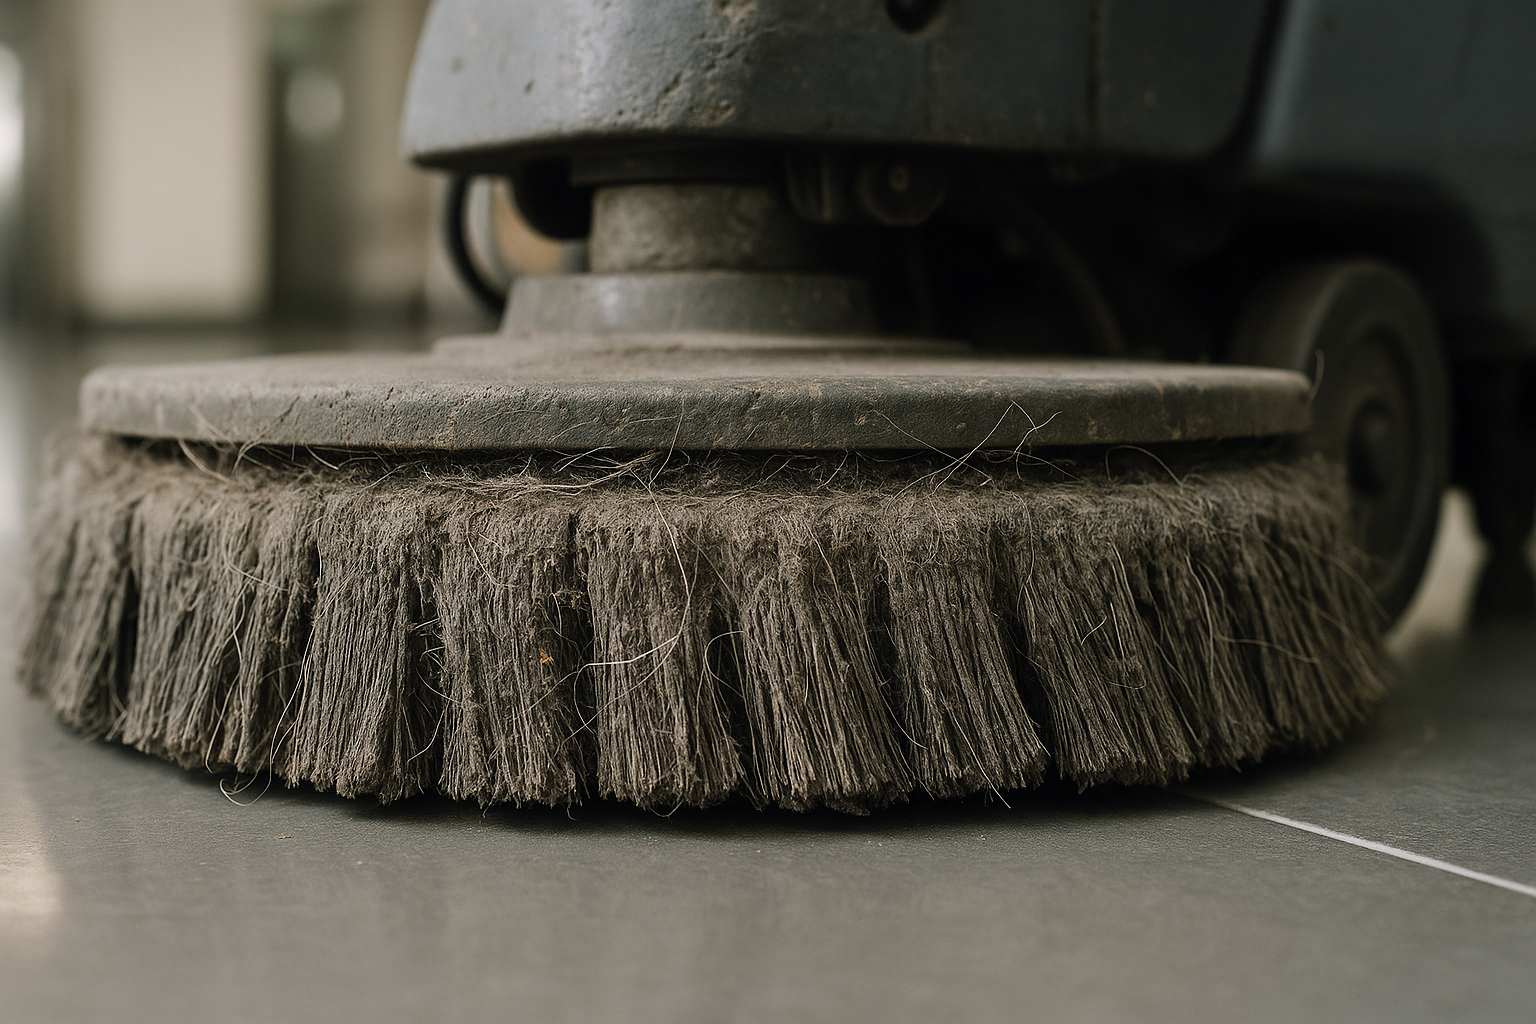
Let’s face it: the brush on your floor scrubber is the real MVP when it comes to cleaning. It’s not just a spinning part; it’s what scrubs away grime, dirt, and all that pesky stuff you don’t want sticking around. Without a properly working brush, your floor scrubbing machine is about as useful as a screen door on a submarine—especially when you’re wrestling with uneven floors or delicate floor types. The brush agitates—loosens up dirt so the cleaning chemicals and solution tank water can do their magic. Neglect this, and your whole setup falls flat.
Common Symptoms of Brush Problems
How do you know your brush is throwing in the towel? You’ll notice streaky floors, or maybe patches that stubbornly refuse to shine. Sometimes the brush stops spinning altogether, or perhaps it whines like it’s talking back with strange noises. These are typical signs of common floor scrubber problems, and ignoring them is like letting your car run on empty—you’ll only end up stranded.
When to Repair vs. When to Replace the Brush
Now, when it comes to fixing or flipping the brush for a new one, it’s not always black and white. Minor issues like tangled debris or loose bristles can often be smoothed over with a bit of elbow grease. But if the bristles are looking more “been through the wars” than “fresh and ready,” replacement is the way to go. Honestly, proper regular maintenance is your best friend here—extend the life of that brush and keep your scrubber humming along nicely.
Step 1: Inspect the Brush for Visible Damage
Check for Worn or Flattened Bristles
The first thing to do is a good ol’ eyeball check—pull off the brush and see what’s what. If the bristles are flattened or patchy, it’s clear your floor scrubber’s cleaning mojo is suffering. Worn bristles don’t agitate well; the result? Floors that look like they’re half-cleaned.
Look for Debris, Hair, or Wire Entanglements
Ever tried scrubbing with a brush wrapped in hair or wires? Yeah, it’s just as bad as it sounds. These little critters love to wrap around brushes, blocking rotation and causing a headache. While you’re at it, don’t forget the debris tray—this often-overlooked spot can clog up and slow your whole vacuum system.
Signs That Indicate Immediate Replacement
If the brush looks like it survived a hurricane—broken chunks or shedding bristles galore—it’s time to cut your losses and swap it out. Continuing to use a doomed brush will only make your cleaning equipment work overtime and wear out faster.
Step 2: Check Brush Installation and Alignment
Is the Brush Properly Mounted?
We can’t stress enough how important it is that the brush is mounted just right. One of our clients once spent hours chasing a brush rotation issue only to find it wasn’t seated properly. Make sure yours locks in with no wiggle room.
Ensuring Correct Brush Type for Your Floor
Here’s a nuance worth considering: not all brushes play nicely with every floor type. Using an abrasive brush on vinyl? Bad idea. A soft brush on concrete? You’re not getting the job done. Knowing your floor type and matching your brush accordingly is the secret sauce for spotless results.
Adjusting Pressure Settings
Pad pressure settings aren’t just knobs to turn blindly. Too light, and you’re basically dusting; too heavy, and you risk wearing out both brush and floor prematurely. Find that Goldilocks zone—just right for your unique cleaning job, floor type, and the cleaning chemicals in play.
Step 3: Troubleshoot Brush Rotation Issues
Blocked or Jammed Brushes
Brush won’t budge? Time to investigate. There could be something physically blocking its spin—an errant sock, a chunk of debris, or something less obvious. Remove the brush, clear out whatever’s stuck, and give it another whirl.
Inspecting Belts and Drive Mechanisms
If your scrubber uses belts to power the brush, a loose or frayed belt can cause all sorts of headaches. Check for slack or damage; don’t be that person who lets a slipping belt drag a whole cleaning session down.
Electrical or Motor Problems
When all mechanical suspects are cleared, the gremlins might be electrical. Faulty motors, blown fuses, or loose wiring can stop your brush cold. These problems usually need professional hands unless you’re comfortable working on cleaning equipment circuits.
Step 4: Inspect Hoses, Valves, and Filters
Clogs Affecting Brush Suction or Water Flow
A clogged vacuum hose or blocked valve might sound minor, but it’s the silent saboteur of brush performance. If the water or suction doesn’t reach the brush properly, your cleaning chemicals and solution tank contents won’t be much help.
Cleaning the Brush Hose and Solution Filters
Keep those hoses and filters clean. Honestly, it’s like changing air filters in your car—you wouldn’t skip that, so don’t skip this either. Regular cleaning keeps everything flowing smoothly and saves headaches down the road.
Signs of Wear or Cracks in Components
Wear and tear happen, especially with hoses and valves. Cracks lead to leaks, and leaks mean your vacuum system and the whole scrubber machine lose efficiency. Inspection and timely replacement can keep you in the clear.
Step 5: Maintenance to Prevent Brush Problems
Daily Cleaning Checklist
- Rinse the brush thoroughly after use
- Empty and clean the recovery tank and debris tray
- Wipe down the squeegee blades
Make this a habit, and your floor scrubber will thank you.
Proper Storage to Extend Brush Life
Store your machine in a clean, dry spot—and if you can, keep the brush elevated. This prevents bristles from deforming and keeps dust at bay. Trust me, it’s the small stuff that keeps the show running.
Recommended Replacement Schedule
Even with the best regular maintenance, brushes don’t last forever. Keep an eye on the manufacturer’s replacement schedule or replace brushes proactively based on your use. It can save money and time by preventing unexpected failures.
Step 6: When the Brush Still Won’t Work
Calling in Professional Service
When you’ve tried all the above and the brush still plays hard to get, it’s probably time to call in the pros. They have the expertise to sniff out those hidden floor scrubber problems that might be escaping your eye.
Upgrading to Compatible Replacement Parts
Sometimes, investing in higher-grade brushes or parts designed for your specific automatic floor scrubbers can seriously boost performance. It’s worth considering, especially for high-traffic or specialized cleaning scenarios.
Evaluating if a New Floor Scrubber is Needed
If your machine’s giving you grief every other week, maybe it’s not you—it’s the scrubber. Newer machines often come with improved features and enhanced durability, which can save you a headache and money in the long run.
Tips for Choosing the Right Brush
Brush Types for Different Floor Surfaces
Soft surfaces call for softer brushes; rougher surfaces need stiffer ones. A delicate dance that varies by floor type—not much mystery, just knowing your floors well.
How Pad Pressure Affects Cleaning
Pad pressure settings can make all the difference between just shuffling dirt around and actually getting the floor clean. Too much and you could be doing damage; too little and you’re wasting time.
Matching Brushes to Cleaning Chemicals
Some brushes take chemical exposure better than others—nylon resists harsher cleaning chemicals better than natural fibers, for example. So, your choice can impact longevity and effectiveness.
General Floor Scrubber Maintenance Best Practices
Empty Recovery and Solution Tanks After Each Use
Leaving tanks full is like inviting mildew and odors to set up camp. Always empty and rinse to keep things fresh and working well.
Rotate Squeegee and Inspect Blades
Rotating your squeegee blades and keeping an eye on wear can spell the difference between streak-free floors and a big mess.
Battery Charging and Storage Tips
Proper battery care isn’t just good practice; it’s essential. Overcharging or storing batteries wrong can leave you high and dry right when you need your floor scrubber machine the most.
Final Thoughts
Keep Your Floor Scrubber Performing Like New
With some care and attention—plus a bit of know-how—you can keep your cleaning equipment running smoothly and your floors sparkling. Don’t let minor brush issues turn into costly repairs.
Contact Us for Professional Support
Need a hand? Whether you’re noodling over common floor scrubber problems or want advice on upgrades, give us a call. We’re ready to help you get back to smooth, clean floors—and maybe even save the day along the way.