How to Operate a Commercial Walk Behind Floor Scrubber
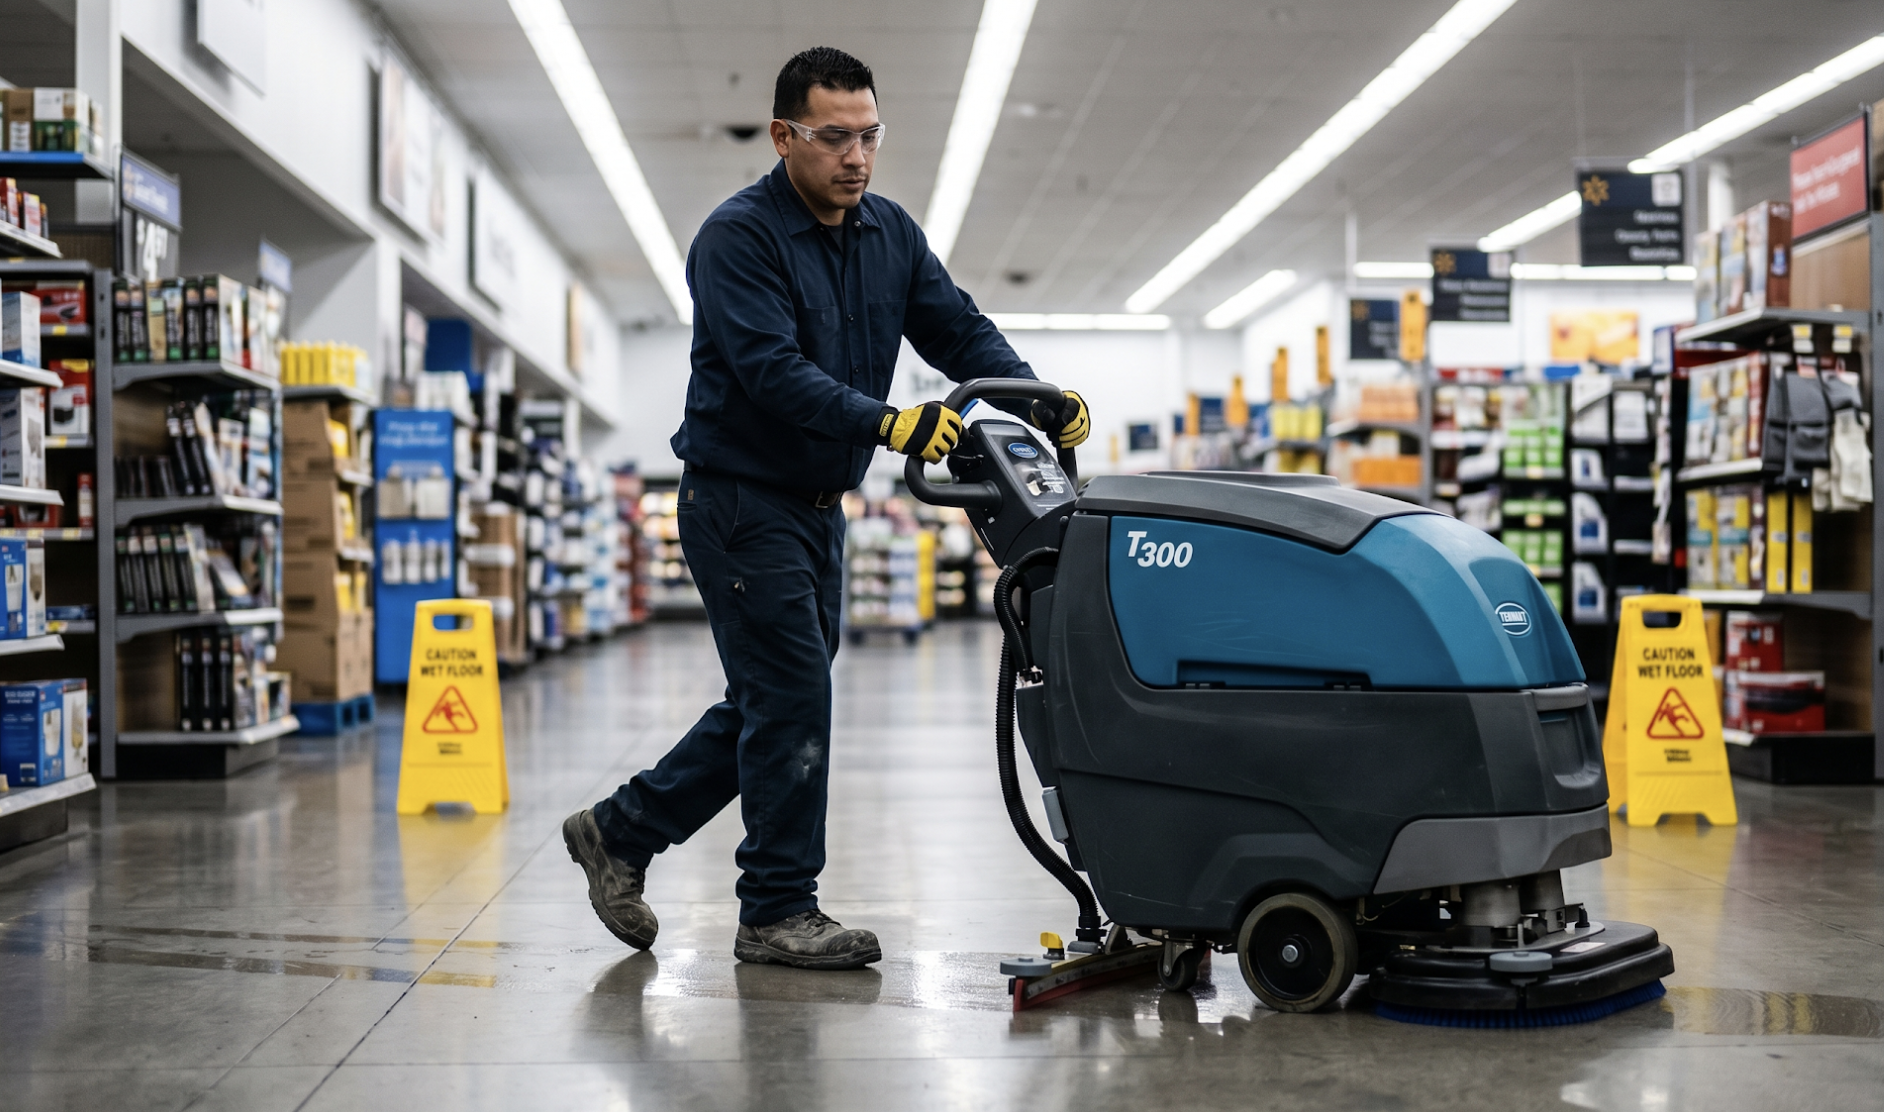
A commercial walk behind floor scrubber is a powered cleaning machine that scrubs your floor and recovers dirty water in a single pass. It dispenses a right cleaning solution through the scrub deck, agitates the surface with rotating brushes or pads, and then vacuums the resulting slurry into an onboard recovery tank. The result is a genuinely clean floor, not a wet one.
Compared to a traditional mop, a floor scrubber machine covers more ground faster, uses significantly less water, and leaves floors dry enough to walk on within minutes. For commercial spaces like office buildings, retail stores, schools, and distribution centers, that difference in speed and results is substantial.
Parts of a Walk Behind Floor Scrubber You Should Know
Before running through the steps, get familiar with the major components:
Solution tank: Stores the water and detergent mixture. Also called the intake tank on some models.
Recovery tank: Collects dirty water after scrubbing. The recovery tank door is opened to drain and rinse after every use.
Scrub deck: The housing beneath the machine that holds the brush or pad assembly and directs solution to the floor.
Brush or pad: The rotating cleaning media that makes direct contact with the floor surface.
Squeegee assembly: The rear rubber blade that channels dirty water toward the vacuum intake.
Vacuum motor: Pulls dirty water from the squeegee channel into the recovery tank.
Water flow control: Adjusts how much solution is released during the scrubbing process.
Handle and speed controls: Allow the operator to steer the machine, set travel speed, and engage or disengage the scrub deck and vacuum.
Choosing the Right Brush or Pad for Your Floor Type
Using the wrong pad or brush is one of the most common reasons operators get poor cleaning results or cause surface damage. Before starting any job, confirm that your cleaning media matches the floor type and the level of soil you are dealing with.
Disc Pads vs. Cylindrical Brushes
Disc (orbital) pad systems are the standard on most walk behind models. They use flat, round floor pads held against the surface by a drive plate and are well suited for smooth floors like sealed concrete, vinyl tile, and coated surfaces.
Cylindrical brushes use two counter-rotating brushes that sweep debris into a hopper while simultaneously scrubbing. They are better suited for textured surfaces, grout lines, and outdoor areas where loose debris is present. Unlike disc models, they can tolerate small loose dirt and debris without pre-sweeping, though pre-sweeping is still recommended for large debris.
Matching Pad Hardness to Floor Surface
Soft pads are used for polishing, buffing, and general scrubbing on painted, waxed, or delicate coated floors. They clean without cutting into the surface finish.
Medium scrubbing pads handle standard commercial tile, sealed concrete, and epoxy. They provide enough agitation for routine deep cleaning without being aggressive.
Hard or stripping pads and stiff brushes are reserved for removing floor finish, heavy buildup, or surface contamination from concrete, uncoated tile, and similar durable surfaces. Using a stripping pad on a soft or coated floor will damage the surface.
For natural stone floors like terrazzo or marble, use a diamond pad specifically designed for that material. You can browse replacement brushes, pads, and scrubbing media for most major machine brands at PS Janitorial.
When to Replace Brushes and Pads
Inspect brushes and floor pads before every use. Signs that replacement is needed include uneven wear across the pad surface, visible thinning or fraying on brush bristles, streaking or missed strips during cleaning, and a noticeable drop in scrubbing effectiveness. Worn media puts more load on the drive motor and reduces optimal cleaning results. Regular maintenance on these components is far less expensive than costly repairs to the machine.
How to Operate a Commercial Walk Behind Floor Scrubber: Step by Step
The following steps apply broadly across most walk behind models. Always refer to your specific machine's manual for settings and specifications, but this sequence covers the core operational process from setup through shutdown.
Step 1: Pre-Sweep or Remove Loose Debris
Never skip pre-sweeping. Running a floor scrubber over large debris can clog the squeegee, grind loose objects into the surface, accelerate pad wear, and damage the machine. Use a standard broom, a separate floor sweeper machine, or a combination scrubber-sweeper to clear the cleaning area first.
Cylindrical brush models can handle small loose dirt and debris, but large debris should always be cleared regardless of machine type.
Step 2: Check the Battery and Disconnect the Charger
Confirm the battery is fully charged before beginning. A partial charge mid-job means stopping to recharge, which adds to operating costs and disrupts the cleaning path. Disconnect the charger cable and stow it in its designated location on the machine before moving. Follow your machine's electrical safety guidelines before proceeding. If your machine runs on a deep cycle battery, keeping it properly maintained ensures you get the full run time on every shift.
Step 3: Fill the Solution Tank
Always add water to the solution tank first, then add your low-foam detergent. Adding detergent first causes it to agitate and foam before the machine is even running, which can lead to foam buildup in the recovery tank and eventually into the vacuum motor.
Use only low-foam, scrubber-specific cleaning solution and follow the manufacturer's recommended dilution ratio for your floor type. The wrong detergent, or too much of the right one, is the leading cause of excessive foam and expensive vacuum motor damage.
Step 4: Inspect and Install the Squeegee and Scrub Deck
Check squeegee blades for nicks, tears, or flattened edges. Even minor damage causes streaking and leaves water behind. Rotate or replace blades as needed before installing.
Confirm the scrubbing pads or brushes are correctly seated in the drive plate or brush housing, and that there is no uneven wear that would cause the deck to run at an angle. Adjust squeegee tilt if your model allows it, based on your floor's surface texture.
Step 5: Power On and Set Your Controls
Insert the key and power on the machine. Disengage the emergency stop if your model requires it. Lower the scrub deck and squeegee to the operating position. Select your water flow level and brush pressure based on the cleaning needs of the job. Higher pressure and flow are appropriate for heavily soiled floors; lighter settings are used for routine maintenance or more delicate surfaces.
Step 6: Begin Cleaning Using the Correct Pattern
Start at the farthest corner of the cleaning area from the exit and work toward the door in straight lines. Slightly overlap each pass by a few inches to avoid leaving uncleaned strips between your cleaning paths. Maintain a consistent pace throughout. Floor scrubbers operate most effectively at a steady walking speed. Moving too fast causes missed spots; stopping and restarting mid-pass affects recovery.
Step 7: Monitor the Solution and Recovery Tanks
Watch both tanks throughout the job. The solution tank empties faster on longer passes or at higher flow rates, and the recovery tank fills with dirty water throughout the cleaning process. When the recovery tank approaches capacity, stop, turn off the water pump and vacuum, and move the machine to an appropriate dump station to empty and rinse it. Allowing the recovery tank to overflow can damage internal components.
Step 8: Handle Stubborn Stains and Heavily Soiled Areas
For stubborn stains or areas with heavy soil buildup, use a double scrub approach: make a first pass with the squeegee raised and suction disengaged to pre-wet and loosen the contamination, then follow with a full second pass at normal operation. On heavily soiled floors, reducing the detergent concentration slightly on the pre-wash pass helps limit foam buildup in the recovery tank during the cleaning process.
Step 9: Shut Down, Raise the Deck, and Finish the Area
When you reach the exit, stop the machine, raise the scrub deck and squeegee to the transport position, and power off before moving off the wet floor. Never roll the machine over a freshly cleaned surface with the deck down.
Post-Use Cleaning and Maintenance
What you do after a cleaning session matters as much as the job itself. Residue left in tanks, hoses, or filters breaks down into buildup that causes foam problems, mechanical failures, and odor. Consistent maintenance steps after every use extend the life of your machine significantly. For a deeper look at what can go wrong when maintenance is skipped, see our guide on common floor scrubber problems and fixes.
Draining and Rinsing the Recovery Tank
Empty the recovery tank immediately after every use. Dirty water left sitting in the tank promotes bacterial growth, creates odor, and can leave residue that clogs filters and hoses. Drain completely, rinse with clean water, and dispose of the dirty water in accordance with local regulations and the handling instructions on your cleaning solution container.
Draining and Rinsing the Solution Tank
Even if solution remains in the tank, drain it after each use. Chemical buildup from sitting detergent can react with future cleaning products or produce foam problems during the next session. Rinse the solution tank with clean water after draining and leave it open to air dry.
Cleaning the Squeegee, Hoses, and Filters
Remove the squeegee assembly and rinse it thoroughly. Inspect blades again after use when wear is easier to see, and rotate or replace as needed. Flush hoses with clean water and check them for blockages. Clean the water filter and any vacuum filters per your machine's maintenance schedule. Neglecting hoses and filters is a common cause of reduced vacuum performance over time.
Emptying the Debris Hopper (Cylindrical Models)
If your machine uses a cylindrical brush deck, empty and rinse the debris hopper daily. Wet debris left in the hopper compacts, creates blockages, and produces significant odor if left overnight. This is a quick step that prevents larger problems.
Leave the Recovery Tank Open and Plug In the Charger
After cleaning all components, leave the recovery tank door open so internal hoses and surfaces can air dry fully. This prevents mold and bacteria from developing inside the tank. Then plug in the charger so the machine is completely ready for the next use. For battery powered floor scrubbers, plugging in promptly after every use protects battery health and maximizes cycle life.
Managing Foam in Your Floor Scrubber
Excessive foam in a floor scrubber is more than a nuisance. When foam overflows from the recovery tank into the vacuum motor, it causes serious and expensive damage. Prevention is straightforward once you understand the causes.
The three main causes of foam buildup are using the wrong detergent type, using too much detergent, and running the machine over heavily soiled floors without pre-washing. All three introduce surfactant load into the recovery tank faster than the vacuum system can handle it.
Prevent foam by always adding water before detergent, using only low-foam scrubber-specific cleaning solutions, keeping detergent ratios within the manufacturer's guidelines, adding a defoaming agent to the recovery tank when you anticipate heavy soil, and pre-washing extremely dirty floors before a full scrubbing pass.
Safety Guidelines for Operating a Walk Behind Floor Scrubber
Walk behind scrubbers are not inherently dangerous, but they operate in shared spaces and involve water, chemicals, and rotating parts. Following basic safety practices protects both you and everyone else in the facility.
Wet Floor Signs
Always set out wet floor signs before you begin and keep them visible throughout the operation. This is especially important in high traffic areas where people may enter the cleaning area from a side hallway or adjacent room.
Hearing Protection
Most electric floor scrubber machines operate below 85 dB, but enclosed spaces like corridors and restrooms can amplify sound considerably. Gas or diesel models often approach or exceed that threshold. Use foam earplugs at minimum. Over-ear protection is advisable in louder environments. Do not use music headphones that require volume increases to compete with the machine, as this defeats the protective purpose.
Respiratory Protection
A basic dust mask protects against airborne particulates during routine scrubbing. When stripping wax or working with strong chemical agents, follow the warning labels on the cleaning solution container for the appropriate respiratory protection. Some stripping chemicals require more than a dust mask.
Eye Protection
Scrub pads rotate at over 200 RPM. Any debris picked up from the floor during the scrubbing process can be thrown outward. Safety glasses are standard protection for any operator running a floor machine.
Appropriate Footwear
Operating a walk behind scrubber on a 10,000 square foot floor means covering nearly two miles on foot. Comfortable, supportive footwear reduces operator fatigue significantly over the course of a shift. If your machine has an adjustable handle height, set it to a comfortable position before starting to reduce strain on your back and shoulders.
Chemical Handling and Gloves
Wear gloves whenever you are pouring detergent or additives into the solution tank. Follow the handling instructions on the chemical container for any additional protective requirements specific to the product you are using.
Tips for Getting the Best Results from Your Walk Behind Scrubber
These practical pointers apply across most machine types and facility types.
Overlap each pass slightly, by about two to three inches, to avoid the thin uncleaned strips that result from edge-to-edge passes. Keep a consistent pace throughout each pass rather than accelerating or slowing down, which affects solution distribution and suction. On heavily soiled zones, double scrub by pre-wetting before the full pass. For natural stone floors, always use a diamond pad rather than standard scrubbing pads to avoid surface etching. Add water before detergent every time. If you are cleaning multiple facility types with the same machine, use a chemical proportioning system to maintain accurate and consistent ratios without measuring manually. Keep up with regular maintenance on brushes, squeegee blades, wheels, hinges, and the battery to maintain optimal performance and avoid downtime. When components do need replacing, our floor scrubber parts inventory covers OEM and aftermarket options for Tennant, NSS, and other major brands.
How to Store Your Commercial Walk Behind Floor Scrubber
Store the machine in a dry location away from freezing temperatures. For extended storage periods of several weeks or longer, disconnect the battery leads to prevent acid leakage and potential corrosion damage to the machine's electrical components. Wet batteries may also require specific maintenance during storage, so refer to your battery manufacturer's guidelines. Before storing, make sure the recovery tank is drained, rinsed, and left open, and that the solution tank is empty and rinsed clean.
Shop Walk Behind Floor Scrubbers at PS Janitorial
PS Janitorial carries a full selection of commercial walk behind floor scrubbers to fit a range of facility sizes and cleaning needs. Whether you are outfitting a small office or managing a large retail or institutional space, there is a machine in our lineup built for the job. Browse our full floor scrubber inventory, including professionally refurbished models and new machines from top brands. Reach out to our team directly for help choosing the right machine for your floor type, facility size, and budget.