
Floor Scrubber Squeegee Not Picking Up Water? Here's How to Fix It
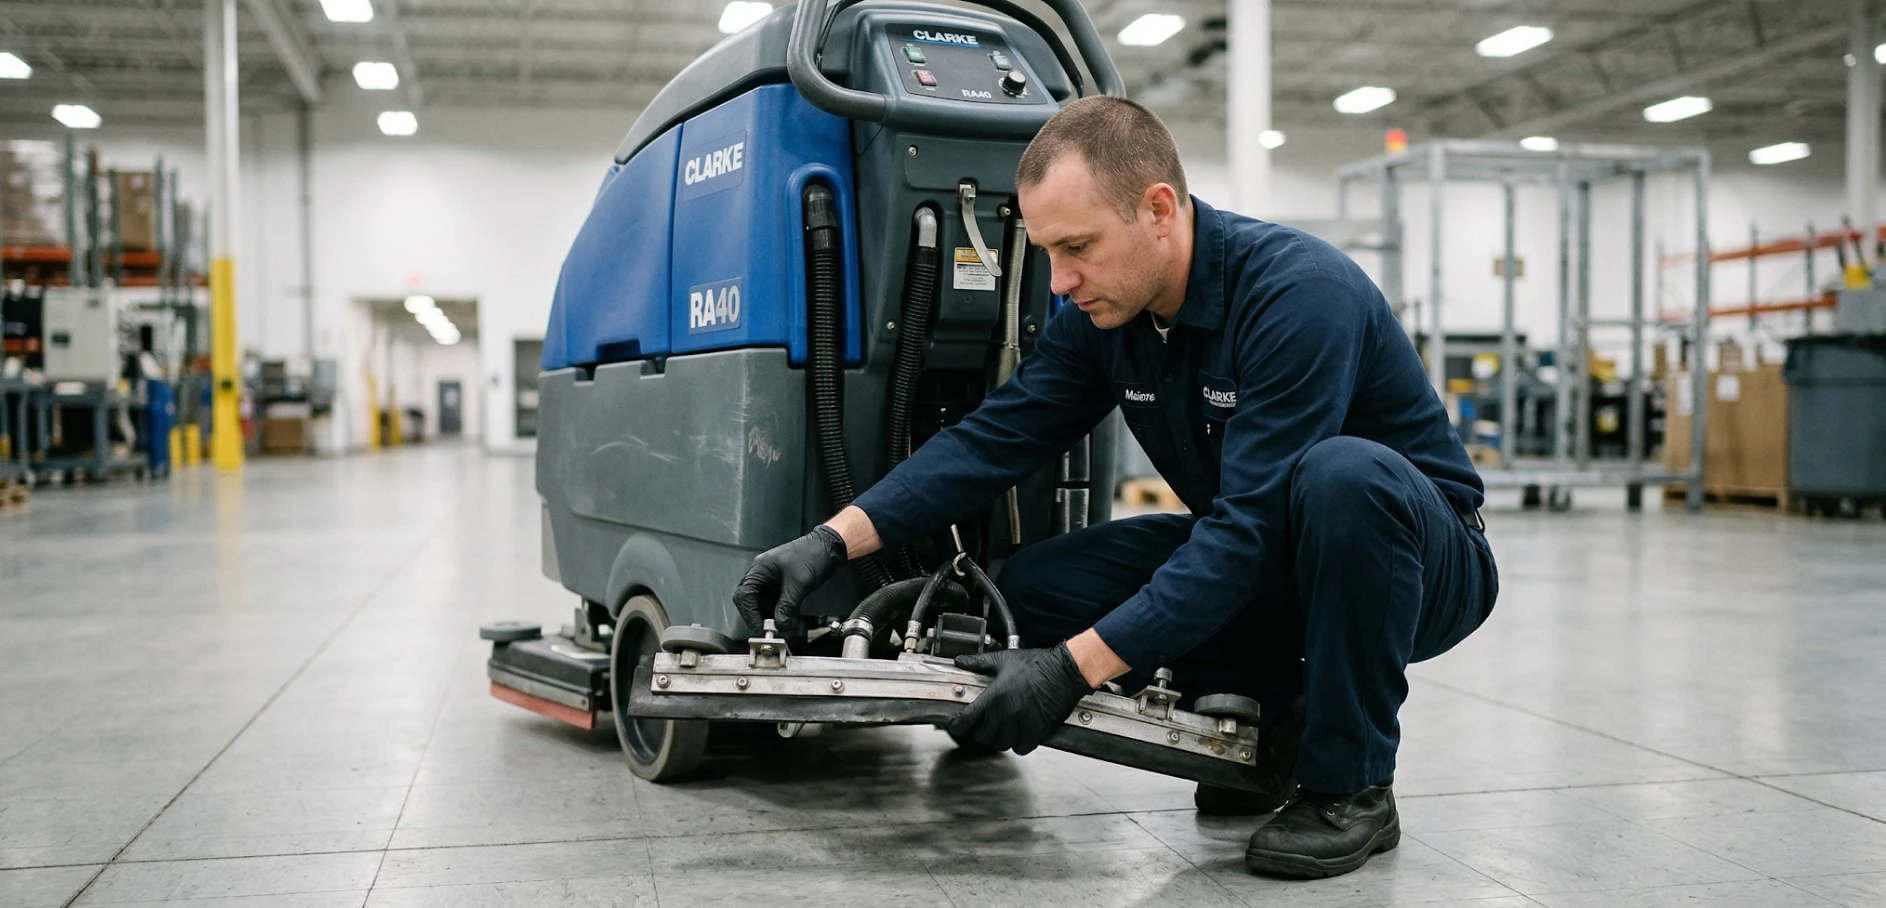
If your floor scrubber is leaving streaks or puddles behind, the squeegee and water recovery system are almost always to blame. The good news: most causes are easy to diagnose and fix without calling a technician. This guide walks you through every possible reason your floor scrubber squeegee isn't picking up water properly — and exactly what to do about each one.
How the Squeegee and Water Recovery System Works
Before troubleshooting, it helps to understand what's supposed to happen. As your automatic floor scrubber moves forward, the squeegee blade channels dirty water toward the center of the machine where the vacuum pickup hose draws it up and deposits it into the recovery tank. If any part of that chain — the blade, the hose, the tank, or the vacuum motor — is compromised, water gets left behind. Here's what to check.
Worn or Damaged Squeegee Blades
This is the most common reason a floor scrubber fails to pick up water. Squeegee blades take a beating from daily use, uneven floors, debris, and harsh cleaning chemicals. When the rubber wears down, curls, or tears, it can no longer maintain a tight seal against the floor surface — and water slips through.
How to Inspect Your Squeegee Blades
Remove the squeegee assembly and lay it on a flat surface. Look for visible tears, uneven wear, curling edges, or any debris embedded in the rubber. Run your finger along the blade edge — it should feel smooth and make full contact across its entire length.
When to Flip vs. Replace the Blade
Most squeegee blades are reversible and have two usable edges. If one side is worn but the other is still in good shape, simply flip the blade over. If both edges are damaged or the rubber has hardened and lost flexibility, it's time for a full replacement. Trying to stretch the life of a worn blade will cost you more in labor and floor damage than the blade itself is worth. Browse replacement squeegee blades for the most common floor scrubber models.
Squeegee Assembly Is Out of Alignment
Even a perfectly good squeegee blade won't pick up water if the assembly isn't sitting level on the floor. The squeegee can get knocked out of position during normal operation — especially when the machine navigates corners or tight spaces.
How to Check and Adjust Squeegee Level
Lower the squeegee onto a flat section of floor and look at it from behind. The entire blade should make even contact across its full width. If one side is raised, loosen the mounting hardware, re-level the assembly, and retighten. Run the machine on a clean stretch of floor to confirm recovery before returning to work. For a detailed walkthrough, see our guide on how to adjust a floor scrubber squeegee.
One thing often overlooked here: pad pressure settings can affect how the machine sits and moves, which in turn affects squeegee contact. If your pad pressure is set too aggressively — effectively tilting the machine's stance — it can pull the rear end up enough to break the squeegee seal. Check your pad pressure settings alongside alignment if the blade looks fine but water pickup remains inconsistent.
Vacuum Hose Is Cracked, Kinked, or Disconnected
The vacuum hose runs from the squeegee assembly to the recovery water tank and is responsible for transporting dirty water off the floor. A small crack, a loose fitting, or a kink anywhere in that hose can introduce air leaks that reduce suction enough to leave significant water behind — even if everything else is working perfectly.
How to Inspect the Vacuum Hose for Leaks
Run your hand along the full length of the hose while the vacuum is running. You'll feel air escaping from any crack or loose connection point. Also check both ends — the fitting at the squeegee and the connection at the recovery tank — to make sure they're fully seated and airtight. If you find any cracks or holes, replace the hose rather than attempting a patch; patching rarely holds under sustained suction.
How to Perform a Back Flush to Clear Clogs
If the hose is intact but suction is still weak, it may be partially blocked. Detach the hose from both ends and run water through it in the reverse direction of normal flow. This back-flush method dislodges buildup that accumulates over time — particularly if the recovery tank isn't emptied and rinsed regularly after each shift.
Recovery Tank Is Full or Clogged
When the recovery tank reaches capacity, the machine has nowhere to put the water it's vacuuming up — so suction drops off or stops entirely. This is one of the simplest causes to fix, but also one of the most frequently overlooked in high-use facilities where the automatic scrubber runs across multiple shifts.
Checking the Float Valve in the Recovery Tank
Most floor scrubbers have a float inside the recovery tank that shuts off the vacuum automatically when it's full. If this float gets stuck in the closed position — usually due to debris or dried chemical buildup — the machine will behave as if the tank is full even when it isn't. Remove the float, clean it thoroughly, and confirm it moves freely before reinstalling.
Also check the fill line marked on your tank. If you're consistently filling the solution tank past the fill line, you may be putting more water down than the recovery system can handle — especially on longer scrubbing runs.
How Often to Empty and Rinse the Recovery Tank
Empty the recovery tank after every use. Rinse it with clean water before storing the machine. Allowing dirty water to sit in the tank causes sludge buildup that reduces suction capacity over time and creates odor problems that are significantly harder to address after the fact.
Debris Tray Is Full
Cylindrical floor scrubber machines use a debris tray to collect larger particles — bottle caps, gravel, food waste — that the machine picks up during scrubbing. A full debris tray restricts airflow through the vacuum system and directly degrades water pickup performance. Check and empty the debris tray as part of your post-use routine, every single shift, without exception.
Vacuum Motor Is Not Running or Running Weakly
If the squeegee, hose, and tank all check out, the problem may be the vacuum motor itself. A motor that isn't receiving enough power — or isn't switched on — won't generate the suction needed for effective water recovery.
How to Tell If the Vacuum Motor Is the Problem
With the machine running, activate the vacuum and listen. A healthy motor produces a consistent, strong hum. A weak or intermittent sound suggests low power or a failing motor. No sound at all means the motor isn't receiving power — check your control panel settings first to confirm the vacuum switch is engaged, then inspect fuses and circuit breakers. In some cases, a faulty computer board can disrupt power delivery to the vacuum motor even when all other systems appear normal; if you've ruled out everything else, that's worth having a technician check.
Battery Charge and Its Effect on Vacuum Suction
On battery-powered floor scrubbers, low battery voltage directly reduces vacuum motor performance. A machine running on a partially depleted battery may scrub fine but struggle to recover water because the vacuum is typically the first system to lose power under voltage drop. Always start a scrubbing session with a fully charged battery — and avoid opportunity charging. Inconsistent partial charges shorten battery life and make this problem progressively worse over time.
Dirty or Worn Lid Gaskets
The gaskets that seal the recovery tank lid are easy to forget but critical to maintaining vacuum pressure throughout the system. When lid gaskets become coated in dried residue from cleaning chemicals or physically degrade, they allow air to enter — which reduces suction and leaves water on the floor. Wipe down the lid gaskets after every use, inspect them regularly for cracking or deformation, and replace them at the first sign of wear. A $10 gasket can prevent hours of poor cleaning results.
Quick Troubleshooting Checklist
Before calling a technician, work through this table in order — most common floor scrubber problems are resolved before you reach the end of it.
| Component | What to Check | Action |
|---|---|---|
| Squeegee blades | Tears, curling, uneven wear, hardened rubber | Flip to unused edge or replace |
| Squeegee assembly | Even contact across full blade width | Loosen, re-level, retighten |
| Pad pressure settings | Aggressive tilt disrupting squeegee seal | Reduce pad pressure and retest |
| Vacuum hose | Cracks, kinks, loose fittings at both ends | Reseat connections; replace if cracked |
| Vacuum hose (interior) | Partial blockage reducing suction | Back-flush in reverse flow direction |
| Recovery tank | Tank at capacity, float valve stuck | Empty tank; clean and free the float |
| Solution tank | Filled above the fill line | Reduce fill volume on next run |
| Debris tray | Full, restricting airflow | Empty completely |
| Vacuum motor | Switch off, weak hum, or no sound | Confirm switch on; check fuses and breakers |
| Battery | Partial charge reducing motor voltage | Charge to 100% before next session |
| Lid gaskets | Cracked, deformed, or coated in residue | Wipe clean or replace |
Preventive Maintenance to Avoid Water Pickup Problems
Most floor scrubber water pickup failures are maintenance failures. A consistent routine eliminates the majority of these issues before they cause downtime.
| Task | Frequency |
|---|---|
| Empty and rinse the recovery tank | After every use |
| Wipe down and inspect squeegee blades | After every shift |
| Empty the debris tray | After every shift |
| Clean lid gaskets | After every shift |
| Back-flush the vacuum hose | After every shift |
| Charge battery to 100% | Before storing |
| Professional inspection | Every 6 months |
Even with good daily habits, floor scrubbers benefit from a professional inspection every six months. A trained technician can identify motor wear, battery degradation, and hose deterioration before they cause a breakdown mid-shift. If your machine runs daily in a commercial environment, treat semi-annual service as a fixed operating cost — it's far cheaper than emergency repairs or replacement equipment.
When to Call a Professional
If you've worked through every item in the checklist above and your floor scrubber still isn't picking up water, the problem is likely internal — a failing vacuum motor, a damaged solenoid, or an electrical fault that requires a trained technician to diagnose. At PS Janitorial, we carry replacement squeegee blades, vacuum hoses, and other wear parts for the most common floor scrubber models. If your machine is beyond repair, explore our inventory of refurbished floor scrubbers — professionally restored and ready to work. Not sure what your machine needs? Call our sales team at 866-856-9093 and we'll help you figure it out.